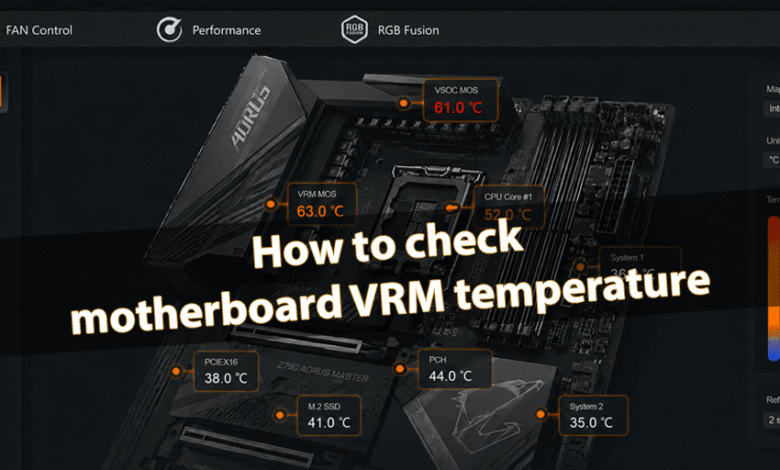
How to check motherboard VRM temperature
You should understand what a motherboard VRM is and why it’s important to monitor its temperature. If MOSFETs overheat under high load, this can cause system instability. VRM overheating leads to throttling, reduced performance, and accelerated capacitor wear.
This article explains how to check a motherboard’s VRM temperature. Some models do not have a dedicated VRM temperature sensor at all, yet they still display a list of sensors with unclear or misleading readings. In real-world testing, professional infrared thermometers are often used alongside portable monitoring software.
Table of contents:
What VRM is and what normal temperatures are
The task of the VRM (Voltage Regulator Module) is to convert the high voltage from the power supply unit into the much lower voltage required by the processor. In short, high temperatures in the VRM area lead to lower CPU frequencies and thermal throttling.
| Product | 225W | 200W | 175W | 150W | 125W | 100W | Phase | Type | Mosfet |
| GIGABYTE B650 AORUS ELITE AX | ✔ | ✔ | ✔ | ✔ | ✔ | ✔ | 7 | Dual | 2x Infineon TDA21472 70A |
We have the GIGABYTE B650 AORUS ELITE AX. This motherboard handles Ryzen 9 7950X overclocking without issues, which is also reflected in our VRM comparison table. CPU power consumption reaches 240 W, while the VRM temperature stays at just 56 °C. This is what an ideal motherboard VRM temperature looks like.
Of course, we are referring to CPU stress testing. However, some motherboards can reach critical VRM temperatures even without load. So, what VRM temperatures are considered normal:
- Up to 60 °C — Ideal. Everything will work without issues.
- 60 — 80 °C — Acceptable. A well-ventilated case is recommended.
- 80 — 100 °C — Critical. Accelerated capacitor wear may occur.
- 100+ °C — Dangerous. Heavy loads will cause overheating and throttling.
Checking VRM temperature in Windows 11
HWiNFO64
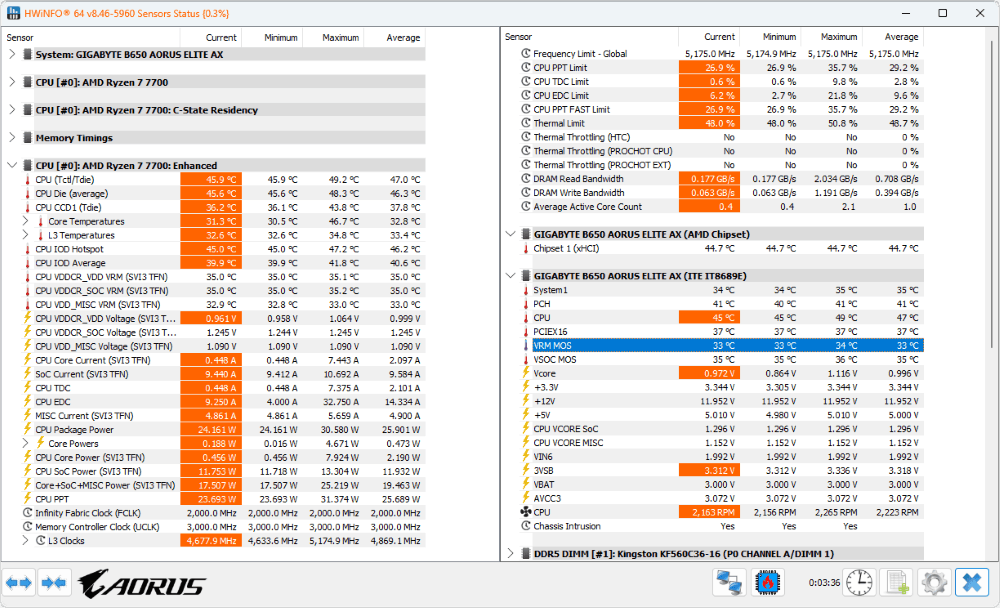
After launching the program, you can select either Full mode or Sensors-only. In the Sensors section, find your motherboard. All available sensors are listed under it. The VRM MOS reading is the primary value to pay attention to, while the VSOC VRM reading is less relevant.
OCCT Personal
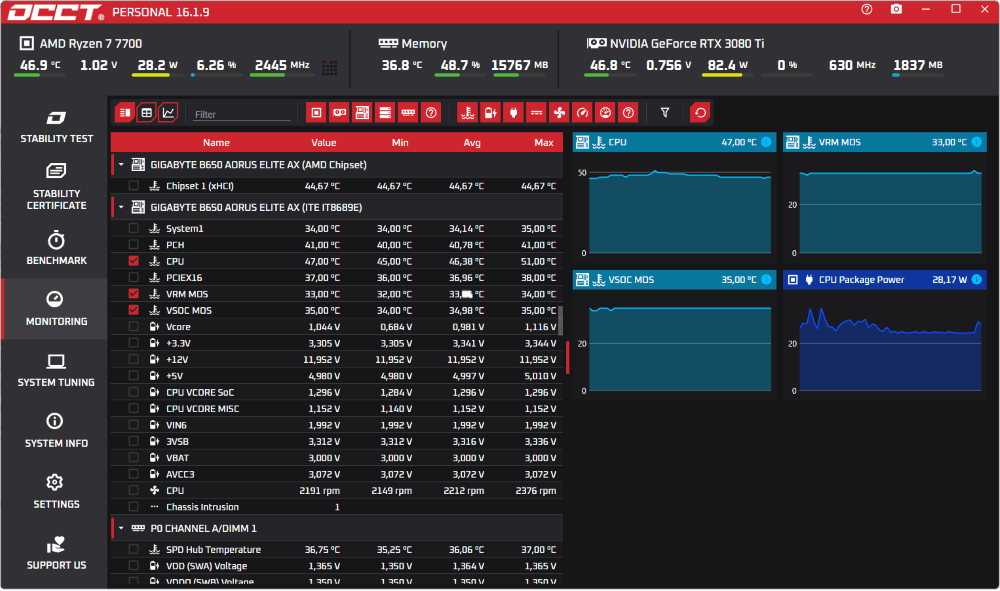
In the Monitoring section, find your motherboard and check VRM MOS. It shows the temperature of the MOSFETs responsible for CPU power delivery. A graph will appear next to it, allowing you to track how the temperature changes over time.
AIDA64 Extreme
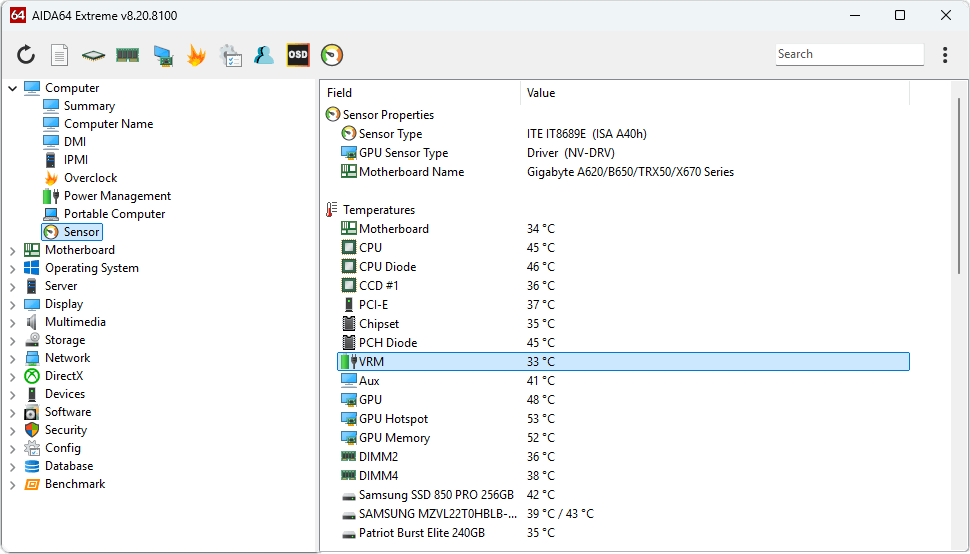
Open Computer > Sensors and locate the VRM temperature sensor. As we can see, the list shows only one VRM sensor. The program does not support separate SoC VRM readings for this particular motherboard.
Motherboard manufacturer software
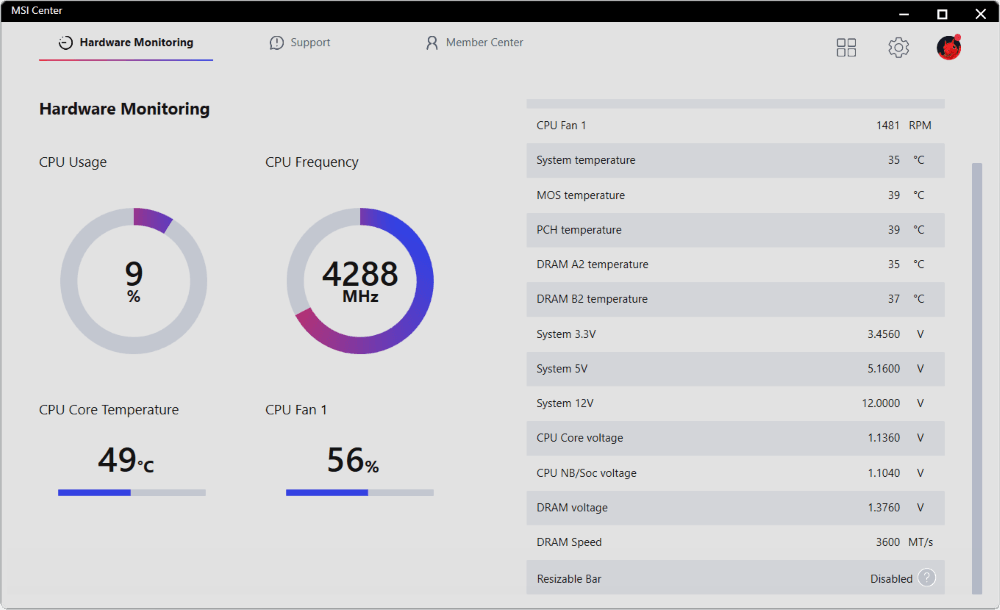
MSI Center
In the Hardware Monitoring section, find the MOS temperature. Another tool is MSI Command Center, which focuses on CPU and memory overclocking. Similarly, go to Information > HWMonitor > Temperature and check MOS.
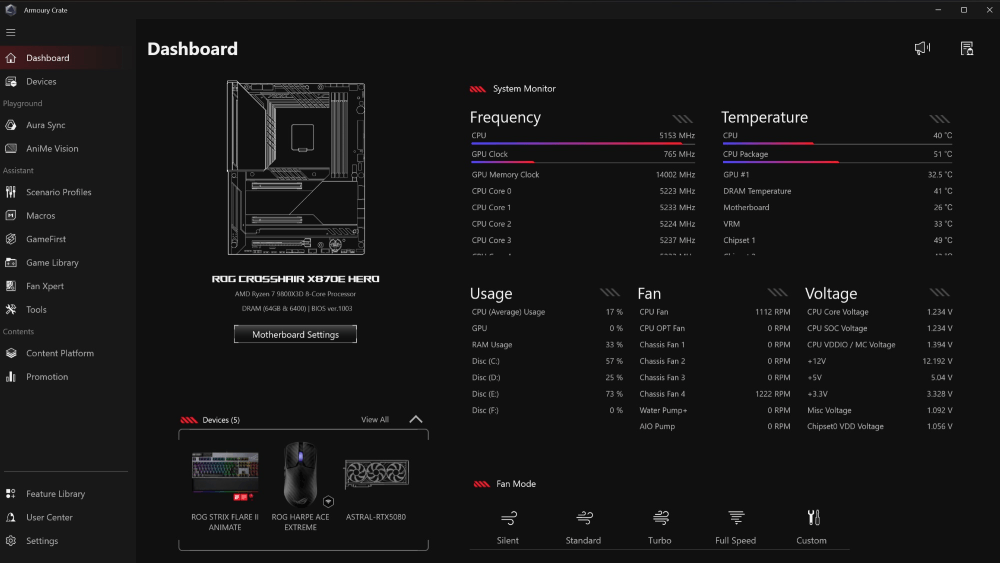
Armoury Crate 6
On the main page, in the Dashboard section, find the Temperature column and check the VRM reading. This was also available in previous versions.
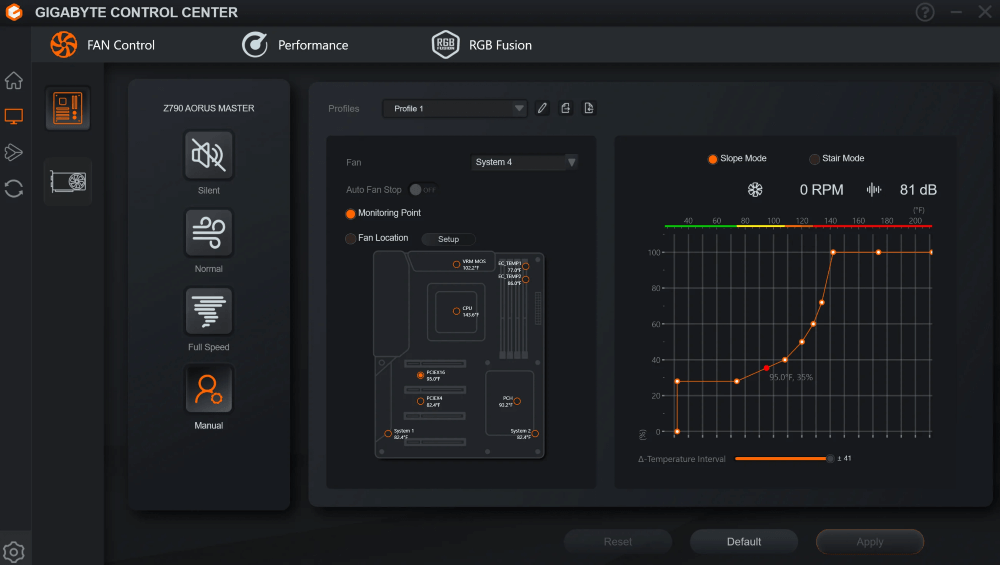
Gigabyte Center Control
Open the Fan Control section and switch to Manual mode. This section may not be available depending on the software version and motherboard model.
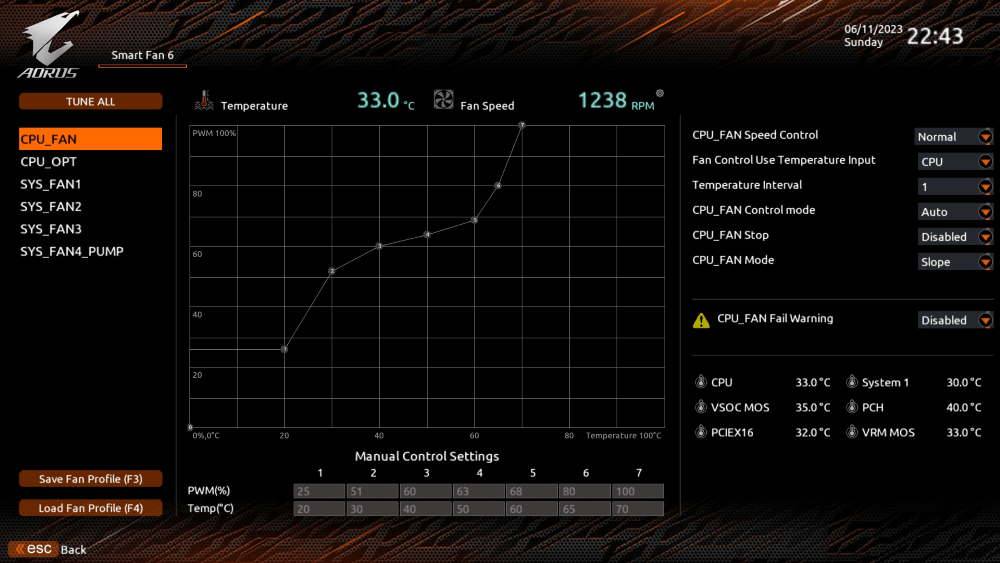
How to check VRM temperature in BIOS
Using this method, you can check the VRM temperature, but only at idle. In the updated MSI Click BIOS X, open Hardware Monitor and find the MOS temperature. On Gigabyte boards, open Smart Fan 6 and check the VRM MOS reading.
External methods for measuring VRM temperature
Such methods include using a pyrometer or a thermocouple, which provide more accurate readings due to direct contact. A pyrometer can measure the surface temperature of the VRM, heatsinks, the back of the motherboard, or the MOSFETs themselves.
The resulting image will look as follows:
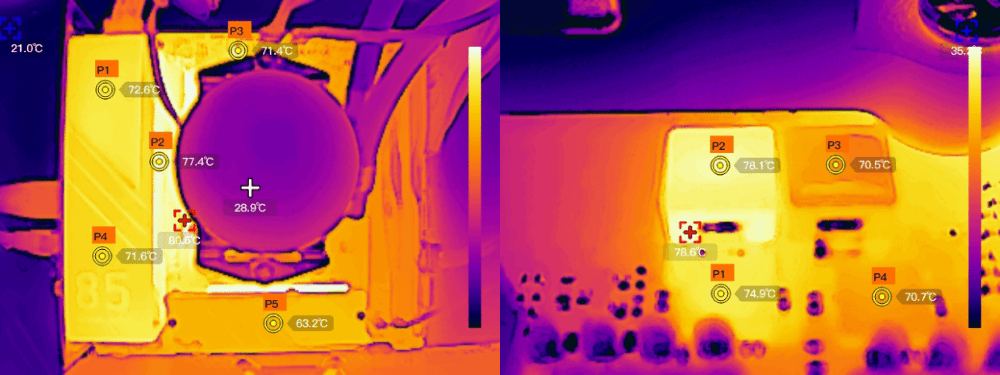
This is the only option if software is not available. Overheating can also be detected even without direct measurement. It is accompanied by a sharp drop in performance, either temporary or sustained. CPU core clock speeds will decrease as a result.
VRM temperature sensors: names and locations
Motherboards may have several VRM zone sensors, or none at all. Budget models usually do not include these sensors. It also depends heavily on the software. On my motherboard, HWMonitor shows a whole list of TMPIN0, TMPIN1, TMPIN2, TMPIN3, TMPIN4, and TMPIN5, but the question is which sensor corresponds to the VRM temperature.
The most common names include:
| HWiNFO64 | AIDA64 | HWMonitor |
|
VR MOS |
VRM MOS |
MOS |
As an example, we’ll use the Colorful CVN B850I GAMING FROZEN V14 motherboard. The HWiNFO64 software shows a long list of ambiguous sensors, including AUXTIN1, AUXTIN2, and AUXTIN3. Actual pyrometer measurements suggest that AUXTIN1 and AUXTIN2 most likely represent MOSFET temperatures.
On modern motherboards, sensors are placed near the MOSFETs. On the left side of the CPU socket is VRM MOS (responsible for core power delivery), while at the top is VSOC MOS (SoC power delivery). If the software shows names such as VR VCC, VR Loop, or SVID, the motherboard reads data from SPS/DrMOS through the PWM controller.
Conclusions
System stability directly depends on the quality of the CPU power delivery system. The GIGABYTE B850 GAMING WIFI6 motherboard can run a Ryzen 9 9950X. However, even with a limited power draw of 150 W, MOSFET temperatures will rise to 85 °C (in a stress-testing scenario, of course).
Therefore, even with a Ryzen 9 CPU, it can still operate stably with a 105 W power limit. There are several ways to reduce VRM temperatures: proper airflow setup, lowering CPU clock speeds, or making a smart motherboard choice.