NVIDIA Low Latency Mode: what should you set?
Using Low Latency Mode requires graphics driver version 436.02 for DirectX 11 games and version 551.23 or later for DirectX 12. This setting reduces latency by limiting the number of frames the CPU can prepare before they are processed by the GPU.
This article explains how NVIDIA Low Latency Mode works. The goal of this technology is to reduce input latency by shortening the frame queue. In effect, Low Latency Mode replaced the “Maximum Pre-Rendered Frames” setting. AMD has also introduced a similar feature called Radeon Anti-Lag 2.
Table of contents:
What is NVIDIA Low Latency Mode?
According to NVIDIA, Low Latency Mode allows frames to be submitted for rendering exactly when the GPU needs them. This is particularly beneficial in games where performance is limited by the graphics card.
Simply put. The CPU prepares frames in advance and places them in a queue to be processed by the GPU. This mode shortens that queue, reducing the latency caused by buffering. Frames are submitted for processing closer to the time they are rendered, after which the GPU processes them.
- For the feature to work effectively, the CPU must have sufficient performance headroom, as it is responsible for preparing frames for the GPU. If the CPU cannot keep up with this workload, stuttering and performance drops may occur.
- This mode does not increase frame rates; it reduces latency. In some cases, average FPS may decrease. It is recommended for systems that can maintain a stable 60 — 100 FPS or higher.
- Ultra Low Latency Mode operates at the driver level and works with all NVIDIA graphics cards. An alternative is NVIDIA Reflex, which is integrated directly into supported games. NVIDIA Reflex takes priority over the driver-level mode.
This mode can be enabled in DirectX 9 and DirectX 11 games when using driver version 436.02 or later. Starting with driver version 551.23, Low Latency Mode also gained support for DirectX 12. However, in DirectX 12 and Vulkan games, frame queue management is often controlled by the game itself.
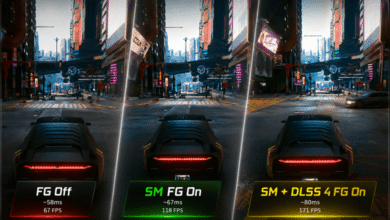
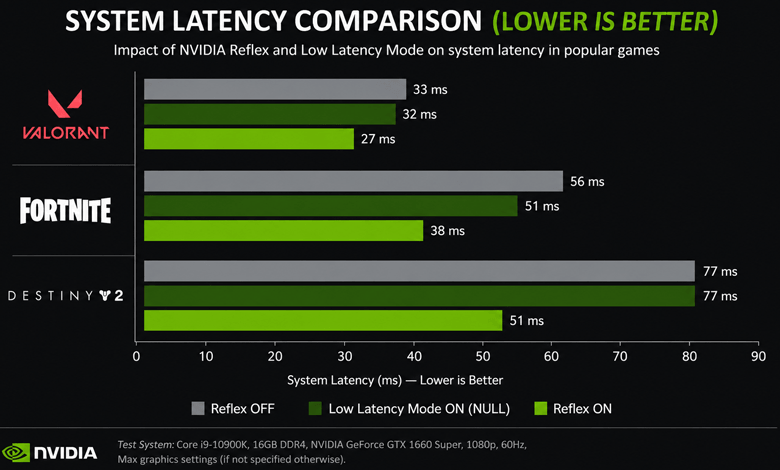
The chart above shows some of NVIDIA’s internal testing results. Enabling Ultra Low Latency Mode has a positive impact on gameplay. In some applications, average latency is reduced by up to 33%.
How to enable NVIDIA Low Latency Mode
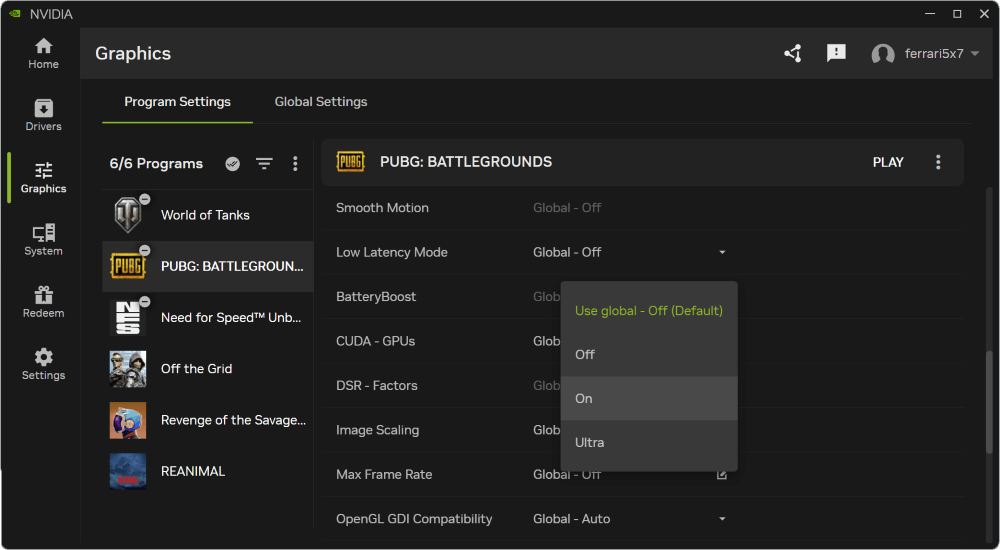
Open the updated NVIDIA App and, in the Graphics > Program Settings section, select the game you want to configure. Find the Low Latency Mode option and set it to On or Ultra.
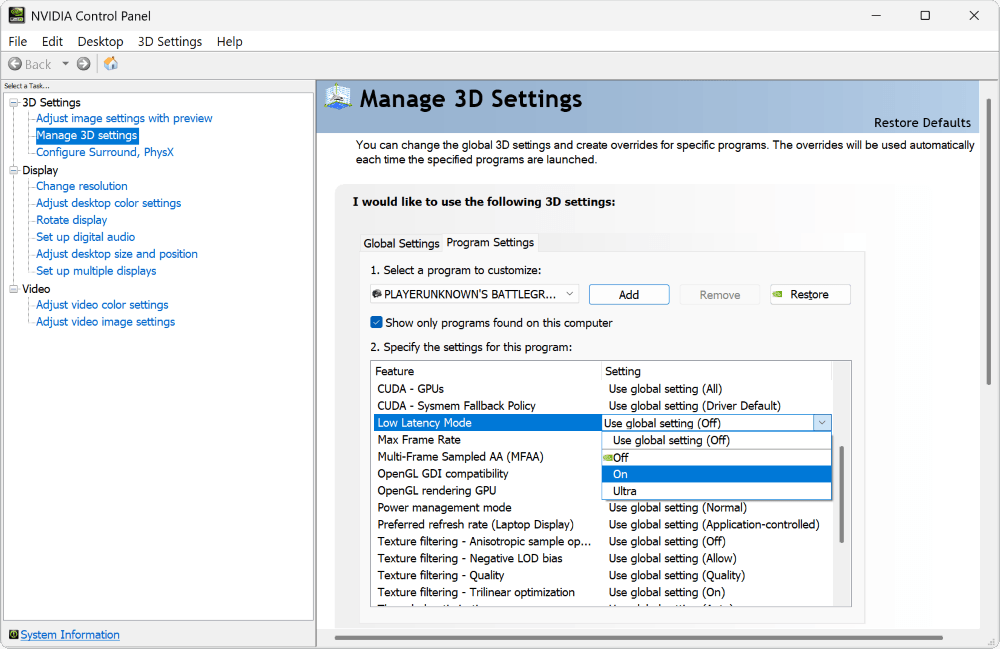
In the classic NVIDIA Control Panel, this mode can still be enabled. In 3D Settings > Manage 3D Settings, find the Low Latency Mode option and set it to On or Ultra. It is better to enable it for a specific game as a Program Setting.
If necessary, the user can reset all settings to their default values using the Restore button. These are the settings that were set during the initial installation of the application. See the table below for a description of the available parameter values.
| Off | The game engine will automatically add approximately 1–3 frames to the queue. This increases rendering throughput, allowing games to build up frame queues more efficiently. |
| On | To reduce latency, it limits the number of frames in the queue to one. This means the maximum number of pre-rendered frames is 1. |
| Ultra | It submits the frame just in time for the GPU to receive it and immediately start rendering. It also helps reduce latency associated with V-Sync. |
Important! This mode may slightly reduce average FPS. In multiplayer games, every millisecond matters. In Counter-Strike 2, it has been implemented directly in the game; look for NVIDIA Reflex in the settings. This feature is more aimed at competitive players.
Enabling Low Latency Mode in NVIDIA Profile Inspector
NVIDIA Profile Inspector allows you not only to view hidden driver settings but also to modify them, similar to the “Smooth Motion” feature. In the case of Low Latency Mode, the result will be identical to configuring it through the NVIDIA App.
You can select PUBG: Battlegrounds, set Maximum Pre-Rendered Frames to 1, and set Ultra Low Latency – CPL State to On.
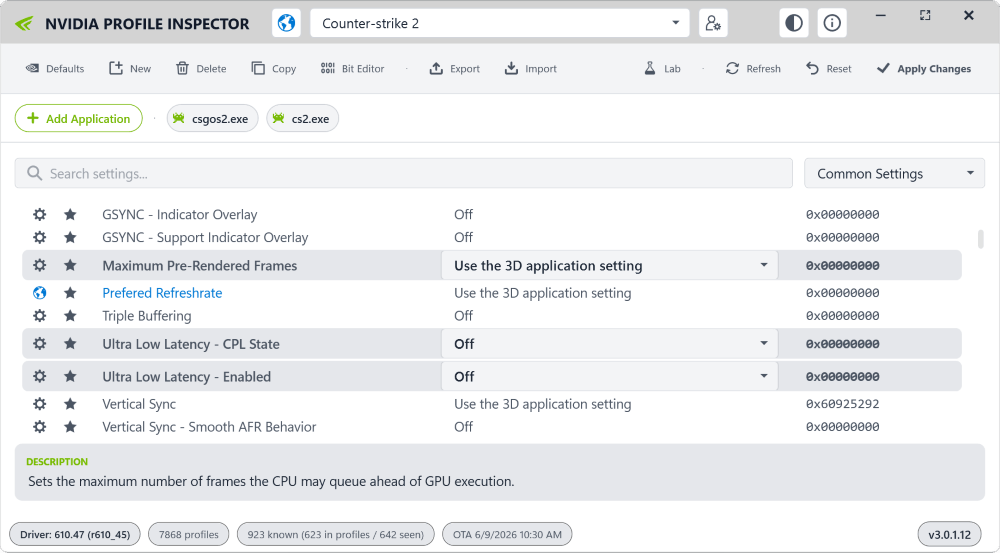
We set Low Latency Mode to “On”. To select “Ultra”, set Ultra Low Latency – CPL State to Ultra and Ultra Low Latency – Enabled to On. For this mode, NVIDIA Profile Inspector lists the following parameters:
| Maximum Pre-Rendered Frames | Sets the maximum number of frames the CPU can may queue ahead of GPU execution. |
| Ultra Low Latency – CPL State | This setting just keeps track of ULL setting for the NVIDIA Control Panel. |
| Ultra Low Latency – Enabled | Enables or disables the driver Ultra Low Latency scheduling path for this profile. |
Final thoughts
For over 20 years, NVIDIA has let users configure the maximum number of pre-rendered frames. This setting has been replaced with Low Latency Mode, which allows frames to be submitted without buffering, exactly when the GPU needs them.
A similar technology from AMD is called Radeon Anti-Lag, which we tested some time ago. However, NVIDIA went further and introduced Reflex. Its purpose is to similarly reduce the rendering queue and synchronize with the CPU, as a large accumulation of data leads to increased latency.